
Creating payment forms and integrating them with different payment gateways is very easy these days. You don’t need to be a techy guy to do that, all thanks to plugins like WPForms, which makes it super easy to create and integrate Payment Forms with Payment gateways.
In today’s guide, I will be sharing how to create payment forms for Authorize.net with WPForms, I have already shared a guide on integrating payment forms with Paypal.
This one is going to be all about Authorize.Net and how you can start using it with WPForms to collect one-time and recurring payments securely.
I will be using WPForms for creating the payment form and integrating it with Authorize.net, so if you don’t have a WPForms license you can get it from the below link.
Table of Contents
Create Payment Forms For Authorize.net in 4 Simple Steps
Step 1: Install & Activate WPForms Plugin
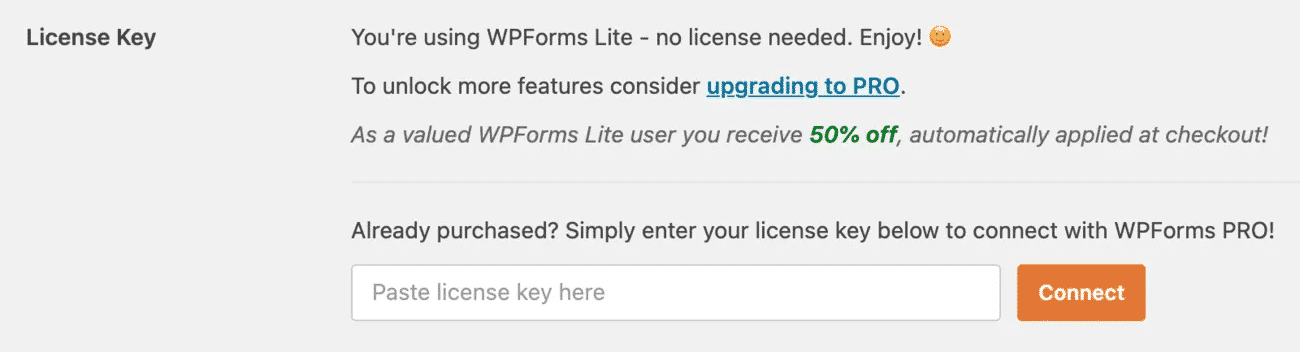
If you have purchased the WPForms Elite license then you just have to install and activate the plugin.
Just go to Plugins>>Add New and search WPForms.
Click on Install Now and then Activate the plugin.

Paste the license key to activate the premium functions.
Now, Just
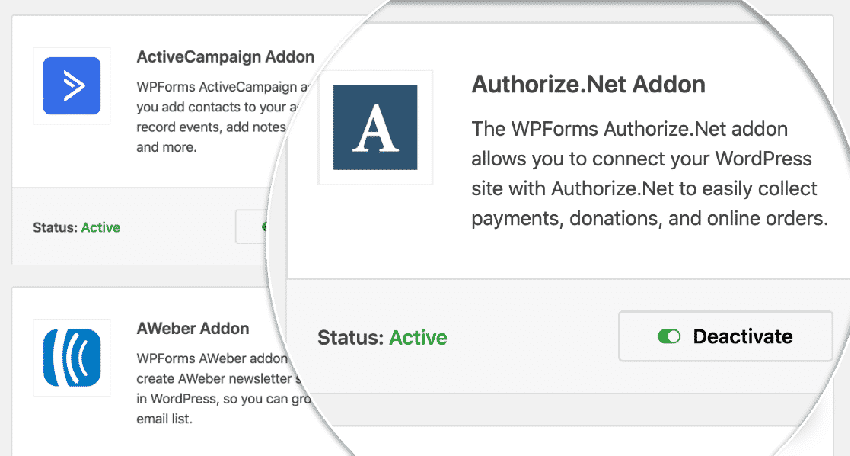
Step 2: Activate the Authorize.net Addon
Just go to Dashboard >> WPForms >> Addon > Authorize.Net.
Click on Activate to enable the Addon.
Step 3: Connect Authorize.Net to Your WordPress Website
Now you need to connect your WordPress website with the Authorize.net account so that payments can be processed smoothly.
For this, go to WPForms>>Settings and click on the Payment tab.
You can configure the currency to your preferred choice.

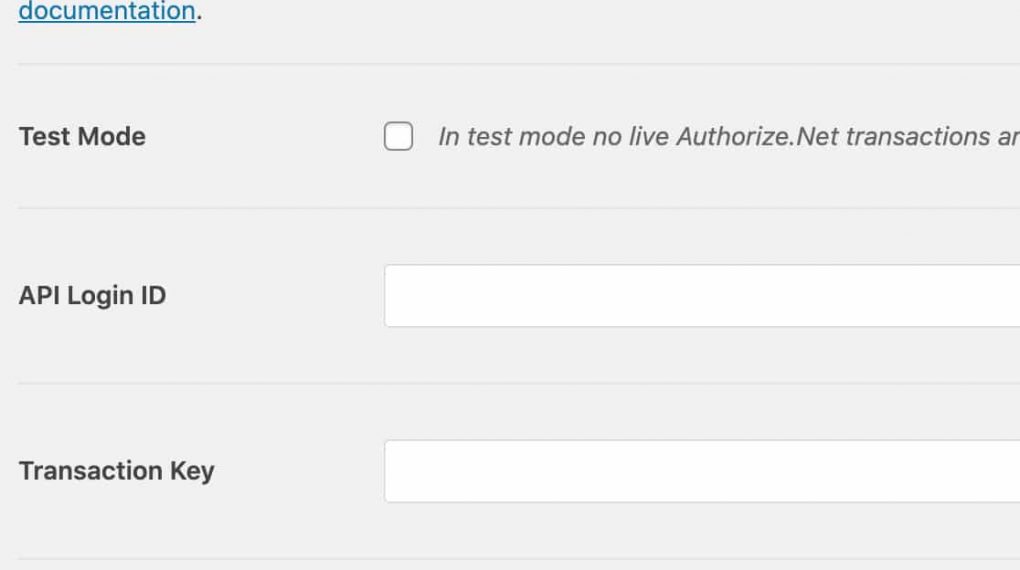
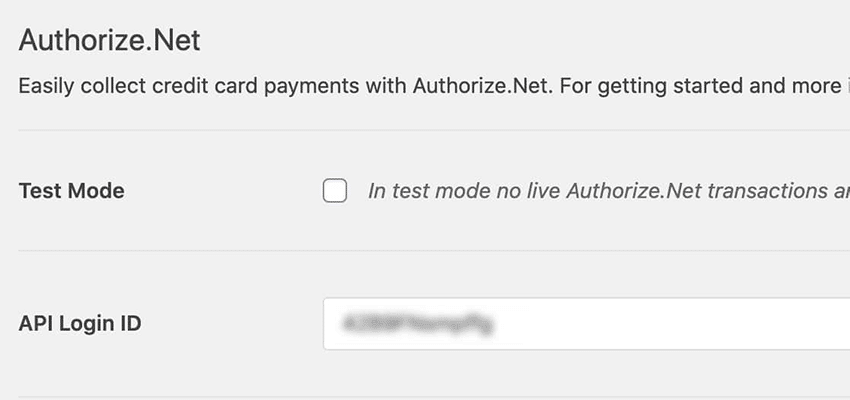
Go to the Authorize.net section of the page.
In this section, you will be asked to enter API Login ID and Transaction Key to authorize the connection between your forms and Authorize.Net.
You can easily find these details in your Authorize.net account.
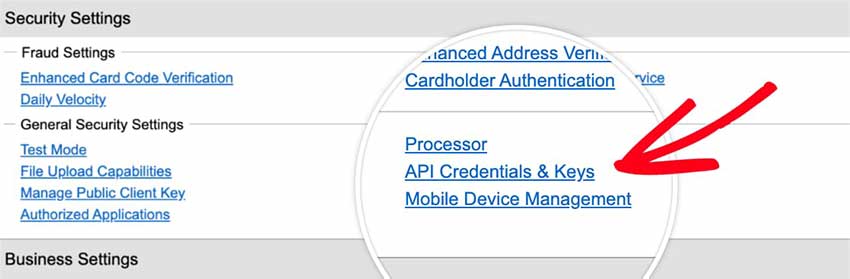
Login to your Authorize.net account and make sure your account is in Live Mode and not in Test Mode.
Now, Go to Settings>>API Credentials and Keys.
Copy the details and paste them into the WPForms tab.
Now, It will ask you for a Transaction Key.
You can get it from the API Credentials and Keys page in the Authorize.net account.
In the Obtain option here, select New Transaction Key and then, click the Submit button.
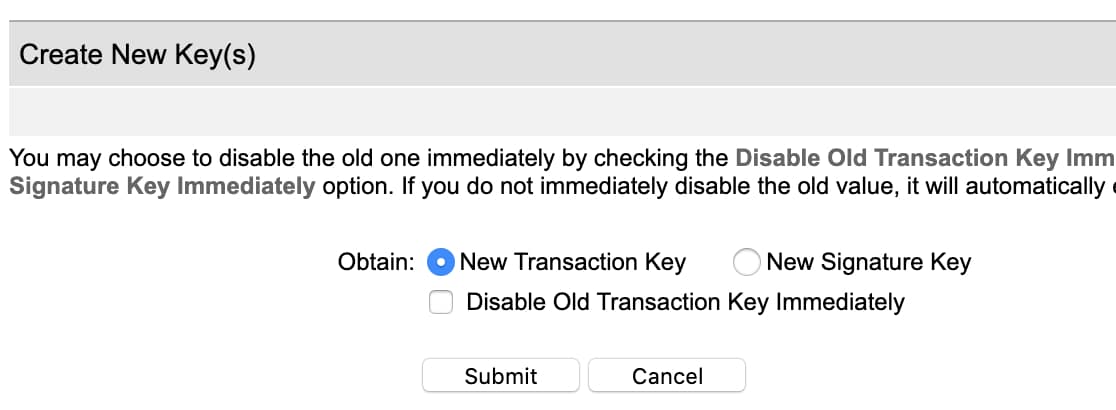
It will send a Pin to your email address to verify your identity. Complete that process by verifying the Pin.
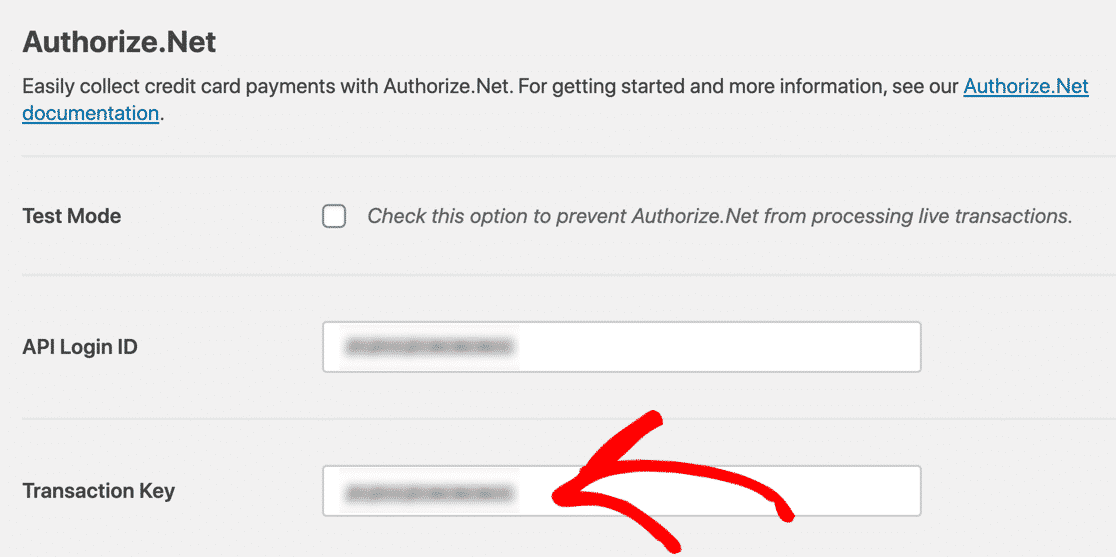
If you have completed all the above steps carefully then you will see your Transaction Key on your screen.
Copy that and paste it in the WPForms Tab and click Save Settings.
Your WPForms Account is now successfully connected with your Authorize.net Account.
Step 4: Add Authorize.net to your Payment Form
The final step is to integrate your Payment form with your Authorize.net account.
For this, you can either create a new payment form or you can edit your existing Payment forms by clicking the edit form button.
Once WPForms builder is open, You can easily add the Authorize.Net field to your form. You can place it anywhere you like.
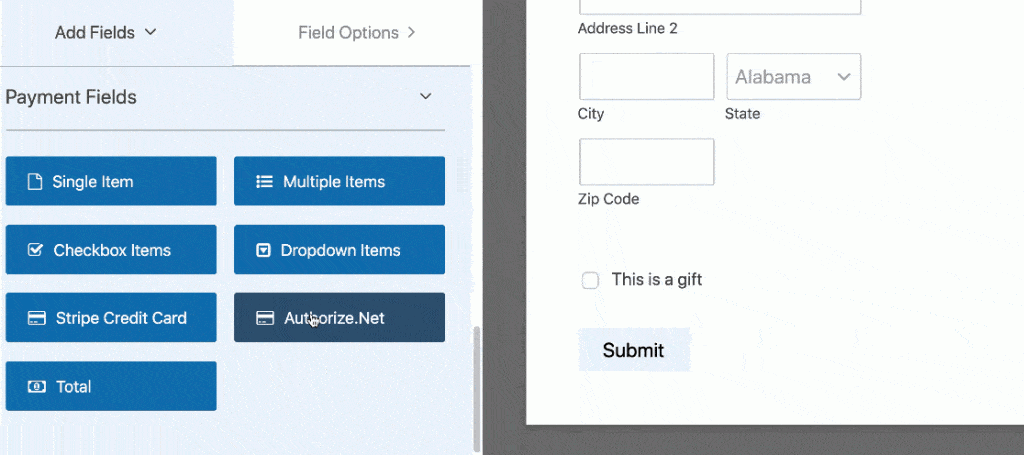
You can easily use the drag and drop feature to edit and place the different fields.
Once you are done editing the form, Go to Payments » Authorize.Net and click on the Enable Authorize.Net payments checkbox option.

This will enable Authorize.net payments on your WordPress website.
Apart from just enabling Authorize.net payment, You need to configure some of the additional settings as well:
- Enter your Payment description.
- Select Authorize.Net Payment Receipt. You can select Email to have Authorize.Net send a receipt.
- Select Name in the Customer Name field.
- And adjust the remaining settings as you need.
Click on Save and exit the form builder.
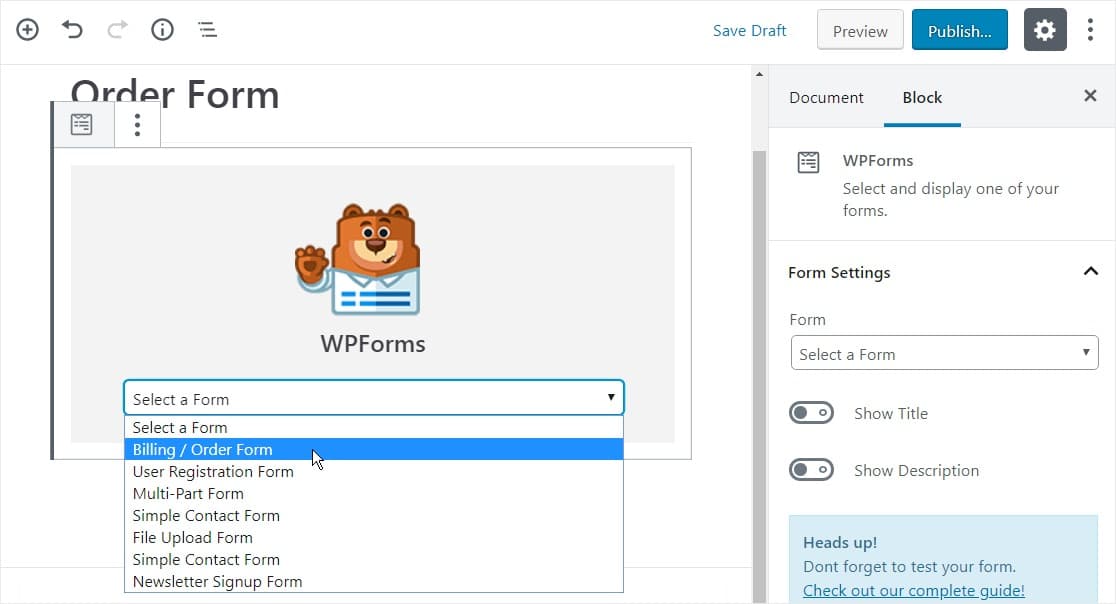
You’re done. You can easily ember the payment form on any of the website pages by using the shortcode or by using the WPForms block in the Gutenberg editor.
Done, You can now easily accept payments using Authorize.net.
Final Words
Adding payment forms and integrating them with Authorize.net has become so easy after the introduction of Authorize.net Addon by the WPForms team. They have some really awesome addons which makes a lot of integration things quite easy.
This post was all about creating payment forms for Authorize.net on a WordPress website.
Feel free to drop your comments below if you have used this WPForms Addon.